Tutorial by Jeremy Birn
Bad exposure in the original shot (below left) hides the giant tree's textural root structure in shadows and washes-out the sunlit areas of the forest. This tutorial shows a powerful luminance-equalization technique, which can enhance both the underexposed and overexposed areas of an image, without reducing the overall contrast of the shot, and without any manual selection of regions. The Equalized result (below right) only took 4 quick steps to improve the shot. The 4 steps are illustrated below.

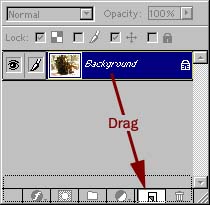
1. In the Layers window, drag the Background layer down
onto the Create New Layer icon. A new layer named
Background Copy is created.
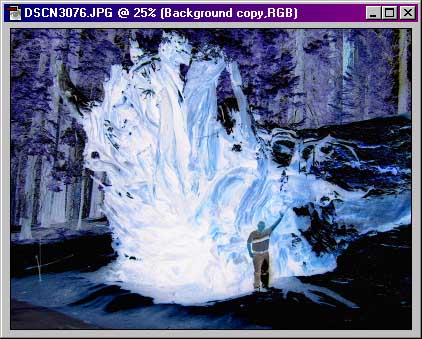
2. With the new layer active, press Ctrl-i
(or choose Image > Adjust > Invert from the menu.)
Your picture will look like a color negative.
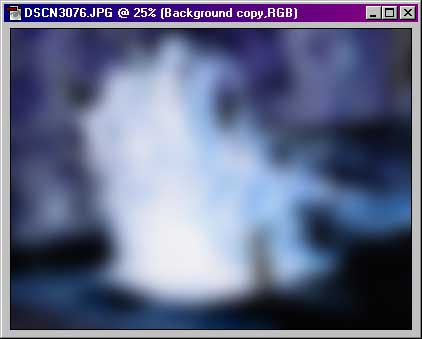
3. Choose Filter > Blur > Guassian Blur from the menu.
Enter enough blur to hide all of the significant detail from your picture.
Often a number between 20 and 40 works well, although very high-resolution
originals may require more blurring to hide the details of the shot. Be
careful to use enough blur that all the detail is hidden - otherwise this
technique might cancel-out local detail that you want to preserve.
4. In the Layers window, change the Background Copy
layer's blending mode to Soft Light.
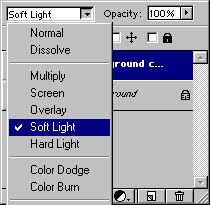
That's it! Your image will now look like the Equalized image above (the right side of the comparison at the top of this page.) The Soft Light blending mode essentially performs burning and dodging functions onto the background layer for you, guided by the values of the inverted layer. The blurring of the Soft Light layer prevents it from neutralizing local detail or graying the image, so it only corrects for the overly dark or bright areas.
You could stop here, but this is also a terrific starting-point for other adjustments:
+ For a stronger effect, you can make a copy of your Soft Light layer, so that it is applied twice.
+ For a complete neutralization of overall brightness/color shifts, turn the blending mode back to Normal, and slide the Opacity down to between 10% and 50% (but not higher than 50%) then Flatten the image from the Layers window, and choose Image > Adjust > Auto Levels to restore the contrast.
+ If the Soft Light layer is tinting your colors in undesirable ways, then make sure the Background copy layer is selected, and choose Image > Adjust > Desaturate. The top layer will now be black-and-white, so it will not tint your original when used as a Soft Light layer. (In earlier versions of Photoshop, choose Image > Adjust > Hue/Saturation instead, slide the Saturation slider left to -100, and click OK.)
The next page shows how this technique is applied in creating seamlessly tiling texture maps for 3D graphics.
All contents of this page Copyright © 2000 by Jeremy Birn. Please do not copy without prior written permission.