| Page 5 | Modeling a Brachiosaurus: Starting the Head |
To start building a head, begin with nothing else visible: Create a new layer called Body surface, and check ‘Off’ to make it hidden. Change the body surface to this layer (as was done with the curves on Page 4.). Hide the background in the Right viewport with ‘HideBackgroundBitmap’ command.
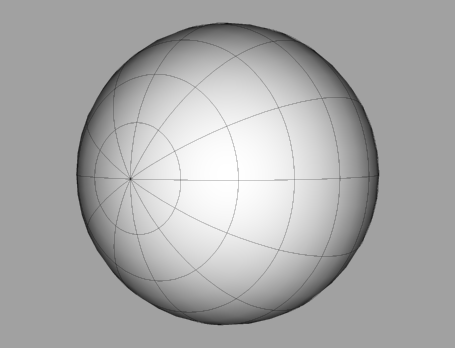
Make a sphere (‘Sphere’ command) in the Front viewport about the center of the axis.
To make the sphere more dense, use the ‘RebuildSrf’ command, and in the ‘Rebuild Surface’ dialog box use a point count of 12 in both directions. This will give you enough points to squash, manipulate, and reshape the surface by dragging selected CV's.

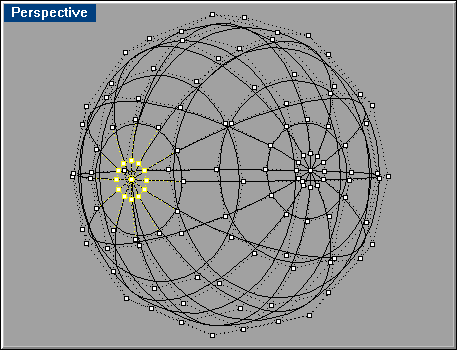
Rotate the sphere so the left end (seen from the Right viewport) is facing you in the Perspective viewport as shown below.
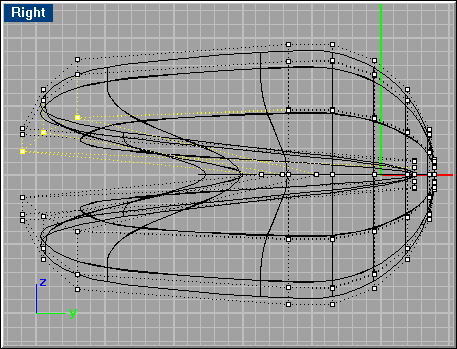
Make the CV’s visible with ‘PtOn’ and in the Right Viewport. As shown below, select the CV’s in the middle and pull them inwards as a start for the basic shape of the mouth. Use ‘DynamicShadingPerspective’ to see the shading while editing.
To make editing easier, select the CV’s shown below, and use ’HidePt’ command to hide the selection of CV’s. This will reduce the amount of visual clutter on the screen, and reduce the risk of accidentally picking points on the back of the surface when you are trying to pick points in the front.

Select the CV’s shown here:

Move the selected points outwards to make the shape of the jaws:

Make the hidden CV’s visible again with ‘ShowPt’ command, select them along with the CV’s of the jaws that weren’t moved, and move them to the left (seen from the Right viewport) so the back of the head becomes shorter relative to the overall shape:

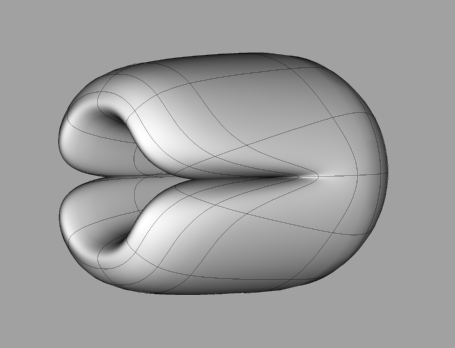
The jaws are wide open, therefore select the CV’s highlighted below, and pull them down.
Select the CV’s on the lower jaw equivalent to the ones on the upper jaw and move those up. The result (shown below) should be similar to the sample file ’brachio3.3dm’ from the CD-ROM.