One of the most powerful features in Rhinoceros is command scripting. Rhinoceros features command scripting capabilities that let you automate modeling tasks and create new commands and icons to perform customized functions. Commandscripts can even build a whole model for you, based on different kinds of imported data or scripted procedures. You don't have to be a programmer or expert user to write command scripts in Rhinoceros.
A Commandscript or Macro is a series of Rhinoceros commands listed together in a text file so that they can be executed automatically in succession. This chapter will show you the different ways to run a Commandscript, the proper way to format Commandscripts, and get you started creating your own scripts.
Running Commandscripts
There are three different ways to run a commandscript in Rhinoceros. If you are new to Rhinoceros or if you have never written any commandscripts it is important that you understand the three different ways to run a commandscript in Rhinoceros. By working through the three easy examples you will gain a good understanding of their differences.
Click on the following three examples to take you step by step through the three different ways to run a commandscript in Rhinoceros.
Example 1 |
Example 2 |
Example 3 |
Commandscripting Syntax
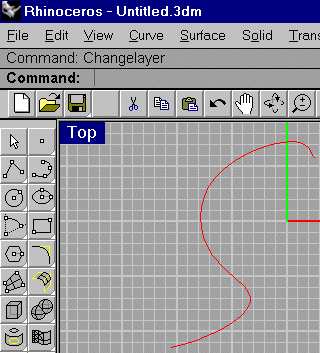
Think of each command in Rhinoceros as a small commandscript. Every command in Rhinoceros has an official "command name". The command name does not necessarily match the command's label that you see in a menu or an icon's tooltip. Only official command names can be used within a commandscript or when typing commands from the keyboard into Rhinoceros. For example, the command labeled "Change layer" in a menu must be typed Changelayer, without a space in a commandscript. Changelayer is the official command name for this function.
Avoid errors by always using the official command name when you type a command. To guarantee accuracy, you can copy the official command names from the help files, and paste them directly into your scripts. You can also type the word "commands" at the command prompt and Rhinoceros will send all its command names to the command history or to the Windows clipboard. You can then view the entire list of Rhinoceros command names in the command history by pressing the F2 hotkey on your keyboard or you can paste it into a text file.
| ! Polyline w0 10,0,0 10<60 w0 enter |
This command tells Rhinoceros to create a polyline Coordinate point to begin creating polyline Coordinate point for polyline Polar Coordinate point for polyline Ending XYZ coordinate point for polyline Tells Rhinoceros to end the script |
Customizing Rhinoceros with Commandscripts
Writing simple Commandscripts assigned to icons will give you a basic understanding of how scripting works because you will become familiar with command names, what they do, and how they interact with each other. This will give you practice writing commandscripts before you go on to tackle larger and more complex projects.
Creating commandscripts on icons lets you customize Rhinoceros with your modeling, editing and display preferences. So you can change your modeling tools and add options to them in Rhinoceros to get your job done quickly and efficiently.
Customizing command "options" that appear at the Rhinoceros command prompt
in the middle of modeling.
Quite a few commands that you use everyday in Rhinoceros have extra options
to them that you have to input from the keyboard as you model. These are
often one letter commands like c, y or n. For instance if you rotate an object,
Rhinoceros also gives you the option to copy that object and rotate the copied
object instead of the original. After you click the rotate icon you would
do this by typing c at the keyboard. This can seem like it is easy enough.
But if you need to rotate copies all the time and do it repeatedly this creates
extra work. Usually you forget to type in the c option after many times of
doing this and end up doing a regular rotate that you must cancel or undo.
Since Rhinoceros has many commands with these extra options you can customize
or make icons already with your pre-selected options to avoid fatigue and
mistakes.
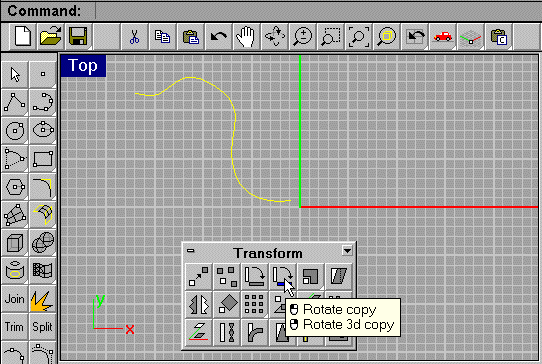
*Remember * You need to select the object you wish to rotate,
scale etc. first then click the icon for these commandscripts to work.
Rotate copy Icons
 |
|
 |
|
 |
|
 |
|
 |
|
 |
|
Scale copy Icons
These icons work similar to the Rotate copy icons. The procedure is exactly
the same as above so I will not illustrate the first four steps.
 |
|
 |
|
 |
|
 |
|
 |
Rendered image of the Scale Copy commandscript in action. The orient, orient 3d icons all have the "c" option that you may want to customize too. |
Copy In place change layer Icon
This commandscript lets you copy any object in Rhinoceros without being prompted for xyz coordinates or typing I. The copied object is then automatically put on any layer you choose. Another one of those commands that automatically performs an option for you, in this case the Inplace option but with a further twist.
 |
|
 |
|
 |
|
 |
The copied curves' wireframe color should be red and should be copied to layer 01. |
Command scripts assigned to icons that control the "Appearance" of Rhinoceros
These Icons are good to have on your main toolbar since you can only access the appearance of Rhinoceros through the main menu then clicking tools/options / appearance, then your preferences. Therefore these commandscripts are great time savers for getting to that extra screen real estate quickly. This also helps when you want to see your model as large as possible on the screen either for viewing or rendering.
Toggle Menus on/off Icon
This commandscript is great to get rid of all menus and prompts in Rhinoceros and just use your icons. Then just click the Toggle menus Icon and you are back to normal. This will give you more room when you need it quickly.
 |
|
 |
|

Toggle toolbars on/off with an Icon
Toggling toolbars on and off can be done from icons too this lets you bring up whatever toolbar arrangement you can imagine. I have kept this one simple. This icon only toggles your left modeling toolbar off. This is why. If you click the Toggle Menus Icon you just made and then toggle off your left toolbar you will have much more screen real estate for checking your model and rendering in. This setup still gives you the main toolbar so you have rendering and other options as well as the icon to click to get back your left toolbar.
 |
|
 |
|

Assigning a command script to a hotkey that toggles all your toolbars on/off
Toggling toolbars on and off can be done from icons too but in this case you will assign it to a Hotkey. This way you can click the Toggle menus Icon then hit the Hotkey on your keyboard with the alltoolbars off toggle and you will have one full big screen of only your beautiful model. This is great for presenting a model to someone and for moving around in the model.
 |
|
 |
|
Click the Toggle menus Icon you just created turning off all menus, see image below.

These small commandscripts are very useful to know and to have assigned to icons. They streamline your work in Rhinoceros by giving you the outside applications you use most available at the click of a mouse button inside Rhinoceros. Some of these run commands will launch an external program like a bitmap editor or calculator right in the middle of modeling.
The word "run" tells Rhinoceros to run an external .exe file. Notice the quote symbols around the path statement. This helps Rhinoceros to read the path statement because there are spaces in it and normally Rhinoceros would then read each word as command.
Adding the standard windows calculator toRhinoceos
One thing that Rhinoceros doesn't have yet is the ability to perform math calculations or the conversions of Standard Units (like Inches to meters) from one form to another. Having quick acess to a calculator helps when you need to perform conversions or math calculations.
 |
|
You must make a link to the standard windows Notepad to follow the rest of the tutorials even if you haven't created any commandscripts yet.
You will use the Windows Notepad to write your command scripts.
Adding a link to Windows Notepad.
|
|
 |
|
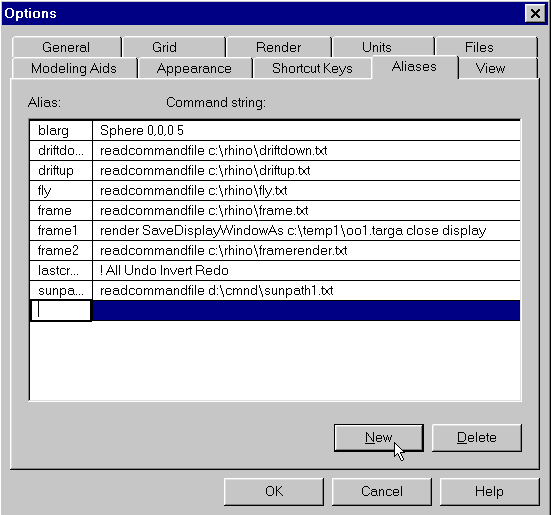
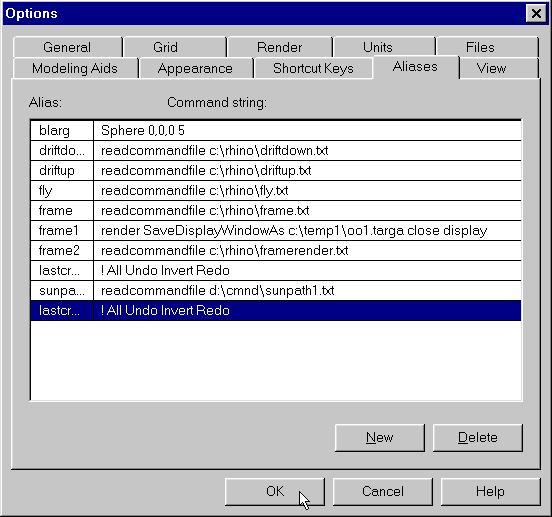
Assigning an often used commandscript to a Rhinoceros alias
Rhinoceros aliases can be used to make command scripts smaller by substituting a word for a whole macro or part of a macro. You find aliases under the Menubar Tools\options\aliases. It saves on typing if you are repeating a whole macro often too. This word or alias for an entire script can then become part of another script. In fact a whole script can be composed of only command aliases which are really names of complex command scripts. Usually though I would create an alias of a certain script when you create a function that is universal to all or many different macros. Then you can include that command script easily in a different command script by typing its alias instead of the whole script.
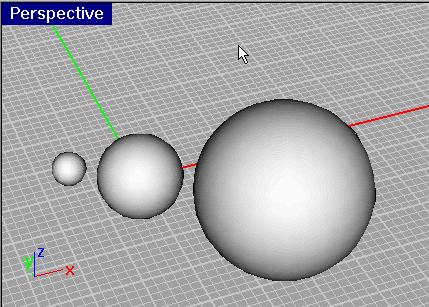
Here is a great example of a commandscript that should be made into a Rhinoceros alias because it can be included in many kinds of different commandscripts. It is universal to all commandscripts. Rhinoceros is missing one often used command that is the command to select the object you last made or created. What makes this even more clever is that this was invented by Rhinoceros user Pascal Golay not a McNeel programmer. At this point no one has tried all the different combinations of commands that can be strung together to create other needed macros and even absent commands. Because no one has tried all the different combinations of commands this will remain a source of inspiration.
**Important** you must have this command as an alias for the following chapter and for the rest of the command scripts to run.
|
|
 |
|
 |
|
Figure 45
 |
|
Commandscripts that add extra Solids to the Solid toolbar
Even though Rhinoceros ships with a great set of solids. You may find that it is lacking some, or that you may want to make your own solids designed to fit your needs. This is easy to do the following examples show you how.
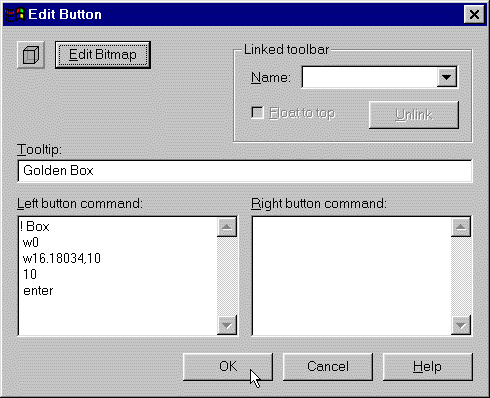
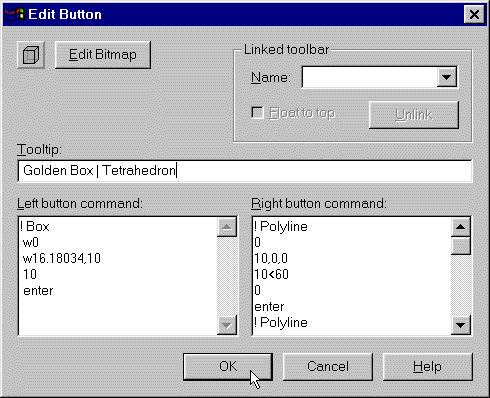
Adding a Golden rectangle box.
 |
|
 |
|
 |
|
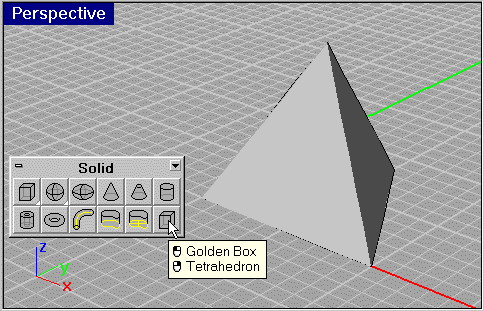
Adding a tetrahedron to the Rhinoceros solids toolbox.
You can copy the command script from the text in this book. Using the Windows notepad and then follow steps 2-6, or you can open the file form the secrets of Rhinoceros cd.
 |
|
 |
|
| ! Polyline 0 10,0,0 10<60 0 enter ! Polyline 0 10,0,0 5,2.88675,8.16497 0 enter ! Polyline 10,0,0 5,2.88675,8.16497 10<60 10,0,0 enter ! Polyline 0 10<60 5,2.88675,8.16497 0 Enter ! Selcurves ! PlanarSrf ! Selcurves ! delete all Joinfaces enter |
That's it not much to it. Notice you didn't have to know any programming code or even leave Rhinoceros to write these macros. You only used the basic Rhinoceros commands learned easily from the help files and by practice. You learned most of the syntax the symbols and protocol for writing successful macros in Rhinoceros just from these examples! No need for compilers or anything else. It's really a testimony to how brilliant the programmers are for making it this simple.
By now you should be comfortable making commandscripts and assigning them to Icons. You learned Rhinos' easy command syntax and you have made all the custom Icons and the one command alias that you will need to tackle the advanced scripting you will do in the next chapter.
